
Yoobi Holiday DIY: Christmas Tree Ornament
It’s the most wonderful time of the year. To kick-off this holiday season, we have a festive DIY craft to share! No need to cut down a tree to get this Christmas tree up and shining. Our DIY Christmas tree ornament uses clothespins to create an easy craft that everyone can get involved in. The kiddos' creativity and imaginations will be ringing with joy!
Here are six easy steps that will have your classroom sleigh-ing all month-long this holiday season!
What you’ll need
- 3 Clothespins
- Paint
- Glue
- Craft Decorations (i.e., glitter, stars, beads, etc.)
Step #1: Materials
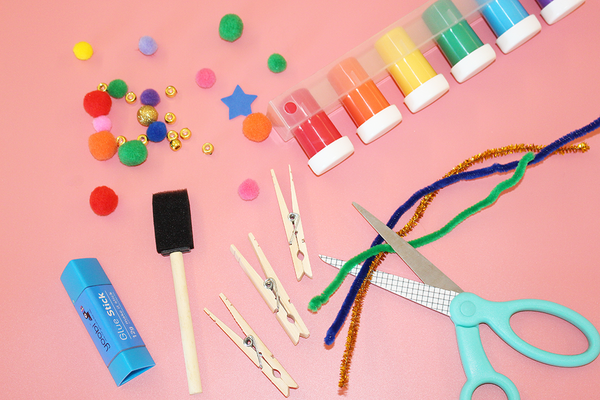
Gather all your materials needed: clothespins, paint, glue, and any craft decorations.
Step #2: De-tach Clothespins
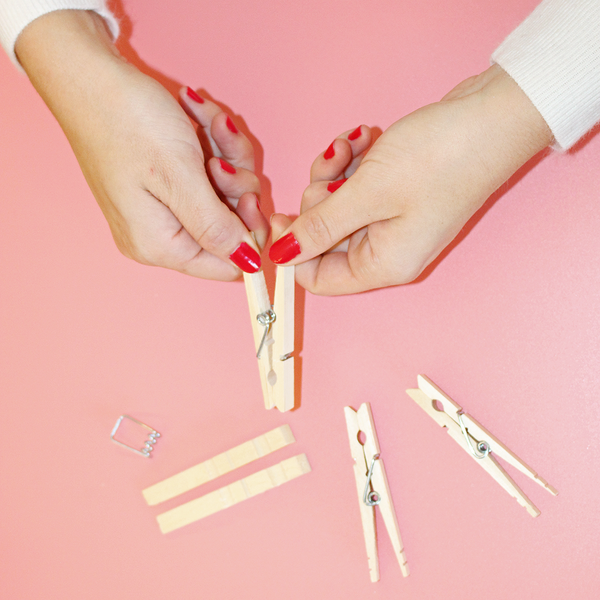
Pull apart each clothespin in order to remove the metal piece from the middle. For this craft, we only need the wooden parts (save the metal parts for another DIY craft). Set aside.
Step #3: Assemble and Glue
Apply the glue to the back of each individual wood piece. Place each wood piece to another and firmly press to each other to ensure the adhesive stays. Let dry.
Step #4: Paint
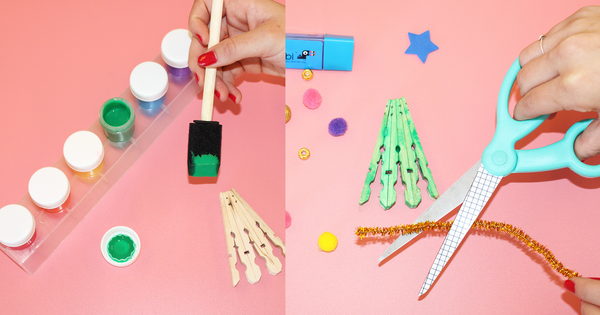
Paint the Christmas tree until covered to the desired look. Let dry.
Step #5: Decorate
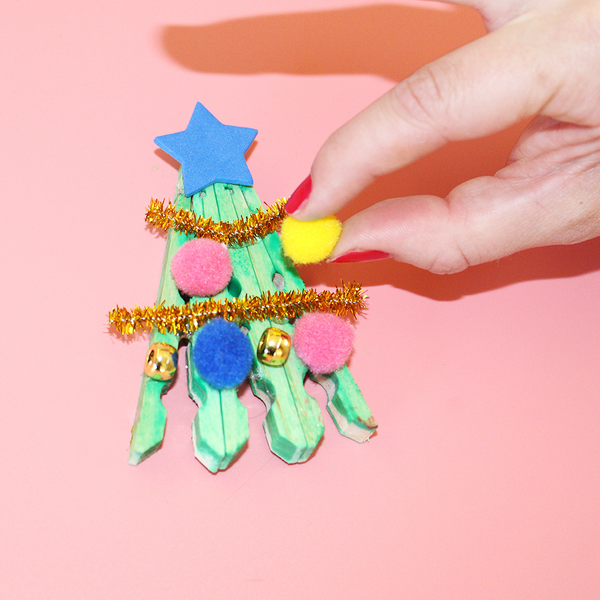
Grab any of your decorations and apply the glue to each decoration. Firmly press the decorations on top of the Christmas tree. Let dry.
Step #6: Repeat Steps 1-5
Continue steps 1-5 until the desired amount of Christmas trees have been made. Have fun and get creative with it!

For Even More Fun:
Turn them into ornaments! Just grab any piece of string and glue them to the back of the Christmas tree. Let dry, and they are ready to go!